Showing posts with label vvdi key tool plus pad. Show all posts

Tuesday, 21 October 2025

Xhorse VVDI Key Tool Plus Programs a VW Passat B6 ID48 Key

Adding a key for the Volkswagen Passat B6 using the Xhorse VVDI Key Tool Plus is a quick and straightforward process, accomplished entirely via OBD. This guide outlines the procedure in four simple steps, including free PIN code reading. Follow the steps below to learn how.


Step 1: Read PIN Code


1. Navigate to: Immo programming > VW > Select by type > 4th immo system - Volkswagen/Skoda/Seat > VW Passat/CC key learn > Start programming.


2. Select 1 - Get PIN/CS > Read from engine(read by OBDII).


Important Notes:

① For the B6/CC/B7, you can read the engine ECU to obtain the PIN and a 6-byte CS code without needing the comfort module dump file.

② Adding a Key: The 7th byte of the CS can be obtained from a working key. For 46-chip keys, use FF for the 7th byte.

③ All Keys Lost: For 48-chip keys, try to make a dealer key. For 46-chip keys, use FF for the 7th byte.

④ Press "OK". A prompt will appear stating "Only support read PIN, CS, MAC now". Press "OK" again.

⑤ Switch the ignition OFF, then ON.

⑥ The login code will be successfully read.


xhorse-key-tool-plus-adds-a-vw-passat-b6-id48-key-1

xhorse-key-tool-plus-adds-a-vw-passat-b6-id48-key-2

xhorse-key-tool-plus-adds-a-vw-passat-b6-id48-key-3

Step 2: Generate Dealer Key


1. Select 2 - Generate dealer key > 48 - generate dealer key.

2. Choose Generate dealer keys with the help of ignition key.

3. You will be prompted to input the 7-byte CS code and the 5-digit password.

4. Insert a working key into the VVDI Key Tool Plus programmer.

5. The 7-byte CS code will be found successfully. Record these bytes.

6. Run the software again and use the first option (7-byte CS is known, generate dealer key). Input the 7-byte CS code and the 5-digit password.

7. Put the new, unlocked key into the VVDI Key Tool Plus Programmer.

8. The key will be made successfully and locked.

xhorse-key-tool-plus-adds-a-vw-passat-b6-id48-key-4

xhorse-key-tool-plus-adds-a-vw-passat-b6-id48-key-5

xhorse-key-tool-plus-adds-a-vw-passat-b6-id48-key-6

xhorse-key-tool-plus-adds-a-vw-passat-b6-id48-key-7

Step 3: Learn Key


1. Select 3 - program key.

2. Input the number of keys to be learned (e.g., 2) and the 5-digit password.

3. Insert each key to be programmed into the ignition switch in turn. Rotate the key until the instrument panel lights are on and hold it for a few seconds.

4. Press "OK" after completing the operation for all keys.

8. You can enter "Immo status" to confirm the number of keys learned in the system.


xhorse-key-tool-plus-adds-a-vw-passat-b6-id48-key-8

xhorse-key-tool-plus-adds-a-vw-passat-b6-id48-key-9

xhorse-key-tool-plus-adds-a-vw-passat-b6-id48-key-10


Step 4: Program Remote


1. Navigate to: Select by type > Remote system > 46 central comfort system (CANBUS Magotan/CC) > Start programming > Program a remote.

2. Press the central lock button once.

3. Use an invalid (non-remote) key to turn on the ignition. (For smart keys: turn off the ignition, place the smart key in the sensing area, then turn the ignition on).

4. Remove the key from the ignition.

5. Press the UNLOCK button on the remote you wish to program for 1 second. Double flashing of the indicators confirms successful matching.

6. Repeat the previous step for all remotes you want to program, then press "OK".

7. Test all remotes to ensure they are functioning correctly.


Done!

xhorse-key-tool-plus-adds-a-vw-passat-b6-id48-key-11

xhorse-key-tool-plus-adds-a-vw-passat-b6-id48-key-12

www.obd2shop.co.uk

Friday, 17 October 2025

Xhorse VVDI Key Tool Plus MQB NEC3526 PCB Wire Cutting Guide

After activating the VAG MQB license on the Xhorse VVDI Key Tool Plus Pad, it is essential to learn how to lift a pin or cut a wire before reading the NEC35xx immobilizer data. This procedure is required to proceed with key learning and all-keys-lost programming for MQB vehicles.


The following guide demonstrates how to cut the correct PCB wire on an MQB dashboard equipped with an NEC3526 immobilizer.


Step-by-Step Guide to Cutting the Wire on MQB Dashboard (NEC3526)


1. Remove the PCB Board from the Dashboard Module

Begin by carefully taking out the printed circuit board (PCB) from the instrument cluster.


vvdi-key-tool-plus-mqb-nec3526-cut-wire-guide-1

2. Access the Connection Diagram in VVDI Key Tool Plus

Navigate through the menu as follows:

Immo Programming → VW → Select by Type → MQB Instrument Immo System → Instrument – MQB48 (VDO/JCI – NEC35xx Locked) → Start Programming → Programmer Read Files → Read NEC35xx Chip

This will display the wiring and connection diagram needed for the procedure.


vvdi-key-tool-plus-mqb-nec3526-cut-wire-guide-2

vvdi-key-tool-plus-mqb-nec3526-cut-wire-guide-3

vvdi-key-tool-plus-mqb-nec3526-cut-wire-guide-4

3. Identify the Wire Cutting Locations

Using the diagram, locate the exact positions on the PCB where the wire must be cut.


vvdi-key-tool-plus-mqb-nec3526-cut-wire-guide-5

vvdi-key-tool-plus-mqb-nec3526-cut-wire-guide-6

4. Carefully Cut the Wire

Follow the instructions to cut the designated wire. Ensure that the FVDD hole no longer conducts electricity to the adjacent capacitor.

Caution: Avoid damaging nearby capacitors during the cutting process.


vvdi-key-tool-plus-mqb-nec3526-cut-wire-guide-7

5. Solder the MCU Cable to the PCB

Once the wire is cut, solder the MCU cable to the board as shown in the diagram.


vvdi-key-tool-plus-mqb-nec3526-cut-wire-guide-8

vvdi-key-tool-plus-mqb-nec3526-cut-wire-guide-9

Completion

After completing these steps, the VVDI Key Tool Plus is ready to read the MQB dashboard immobilizer data.


Important: Once reading is complete, remember to restore the PCB by reconnecting the cut wire or repairing the board as necessary.

vvdi-key-tool-plus-mqb-nec3526-cut-wire-guide-10


Video Tutorial:

https://youtu.be/fsp_NS0khqU


www.obd2shop.co.uk

Monday, 13 October 2025

Benz W210 All Key Lost with Xhorse VVDI Key Tool Plus

The Xhorse VVDI Key Tool Plus Pad provides a solution for programming a Mercedes-Benz W210 in an all-keys-lost scenario directly on the bench. The entire process can be completed in four main steps. Follow the detailed procedure below.


Step 1: Save EIS Data


Navigate to: IMMO Programming >> Europe >> Benz >> Select from system >> EIS tools >> Start programming >> Auto detect (CAN)

Save the EIS data file to a secure location.

xhorse-vvdi-key-tool-plus-program-benz-w210-1

xhorse-vvdi-key-tool-plus-program-benz-w210-2

Step 2: Password Calculation


Navigate to: IMMO Programming >> Europe >> Benz >> Select from system >> Password calculation >> Start

The tool will display "Acquisition finished". Upload the EIS data file you saved in Step 1 using the "Upload Data" button.

After a successful upload, the VVDI Key Tool Plus will automatically begin calculating the password. This process takes approximately 50 seconds.

Once completed, the message "Password has been successfully read out" will appear.

Save the newly generated EIS file, which contains the password.

xhorse-vvdi-key-tool-plus-program-benz-w210-3

xhorse-vvdi-key-tool-plus-program-benz-w210-4

xhorse-vvdi-key-tool-plus-program-benz-w210-5

Step 3: Generate Key File


Navigate to: Prepare key file >> Start programming >> Prepare key file

Load the new EIS file (the one with the password) that you saved in the previous step.

The key file will be generated. A "Key file generation completed" message will confirm that the process is finished.

xhorse-vvdi-key-tool-plus-program-benz-w210-6

xhorse-vvdi-key-tool-plus-program-benz-w210-7

Step 4: Write New Key


Navigate to: Read write key >> Read/Write key via IR >> Start programming >> Write BE key

Load the key file that was generated in Step 3.

Insert the new BE Key into the infrared antenna on the Key Tool Plus device.

The tool will write the data to the key. A "Writing data success" message indicates a successful operation.

Important Note: If the key is a smart key (BE), you must first install the battery and then wait approximately 1 minute before attempting to program the key to the car. During this time, the key's LCD screen will flash.


The key programming is now complete.

xhorse-vvdi-key-tool-plus-program-benz-w210-8

xhorse-vvdi-key-tool-plus-program-benz-w210-9

xhorse-vvdi-key-tool-plus-program-benz-w210-10

xhorse-vvdi-key-tool-plus-program-benz-w210-11

www.obd2shop.co.uk

Monday, 21 July 2025

2018 Porsche Macan S AKL Using Xhorse VVDI Key Tool Plus

In this guide, we’ll walk through the process of performing an All Keys Lost (AKL) procedure on a 2018 Porsche Macan S using the Xhorse VVDI Key Tool Plus.


Step 1: Preparing the BCM & Extracting D-Flash


1. Disassemble the necessary components to access the Body Control Module (BCM).

2. Extract the D-Flash data to generate a new key.


xhorse-vvdi-key-tool-plus-program-2018-porsche-macan-s-akl-1

Step 2: Generating a New Key on the Bench


1. Connect the Porsche solder-free adapters to the BCM & VVDI Key Tool Plus.

2. Go to: Immo Programming → Porsche → New Porsche Key - Generate Dealer Key

3. Select a blank key position (e.g., Key 3).

4. Save the new EEPROM data after generating the key.

5. Refresh the newly saved file to the car.


xhorse-vvdi-key-tool-plus-program-2018-porsche-macan-s-akl-2

xhorse-vvdi-key-tool-plus-program-2018-porsche-macan-s-akl-3

xhorse-vvdi-key-tool-plus-program-2018-porsche-macan-s-akl-4


Note: If you need to add another key later, always use the newly saved EEPROM file for generation.


Step 3: Learning the Key via OBD

1. Reinstall the BCM back into the vehicle.

2. Go to: Immo Programming → Porsche → New Porsche Key - Key Learning

3. Follow the on-screen instructions to learn the new key and erase old keys (if desired).


xhorse-vvdi-key-tool-plus-program-2018-porsche-macan-s-akl-5

xhorse-vvdi-key-tool-plus-program-2018-porsche-macan-s-akl-6

xhorse-vvdi-key-tool-plus-program-2018-porsche-macan-s-akl-7


Final Testing

Test both newly programmed keys to ensure they start the vehicle and function properly.


Conclusion

Using the Xhorse VVDI Key Tool Plus, we successfully performed an AKL procedure on a 2018 Porsche Macan S by:

✅ Generating a new key on the bench

✅ Learning the key via OBD

✅ Ensuring all keys work correctly


For more tools and support, visit: www.obd2shop.co.uk


Thursday, 10 July 2025

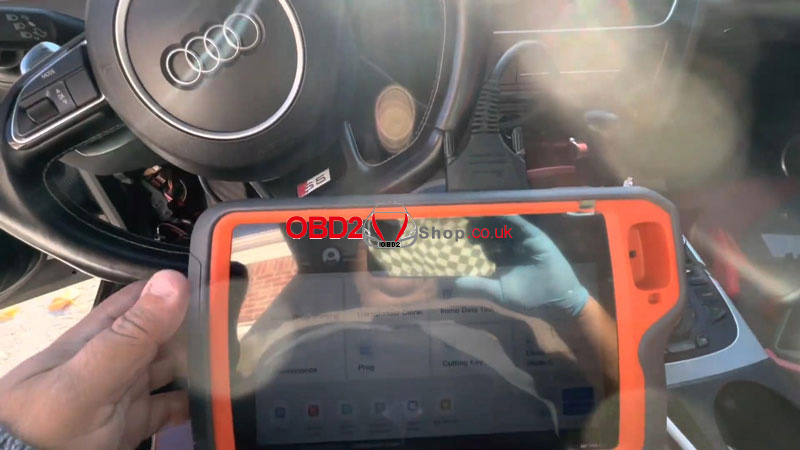
How to use Key Tool Plus to Program 2010 Audi S5 via OBD

In this tutorial, we’ll guide you step-by-step on how to program a 2010 Audi S5 (all keys lost) using Xhorse VVDI Key Tool Plus via OBD. The full procedure includes reading and saving BCM2 data, making a dealer key, and learning the key to the vehicle.

vvdi-key-tool-plus-program-2010-audi-s5-key-1

Step 1: Read & Save BCM2 Data

1. Go to: Immo Programming > BMW > Audi > Automatically Diagnose Models > Start Programming

2. Once the 5th generation immo system is detected, click OK.

3. Choose Read BCM2 Data > OBD Identify BCM2 Type.

4. Follow on-screen prompts:

If you have a key: insert it into the ignition.

If all keys are lost: turn on hazard lights, press and release the brake pedal several times.

5. When prompted:

Read by OBDII > Read BCM2 Data (OBDII) > OK

6. Disconnect BCM module power for 2–3 seconds, then reconnect and click OK to reattempt.

7. Save the BCM2 data file once reading is complete.

vvdi-key-tool-plus-program-2010-audi-s5-key-2

vvdi-key-tool-plus-program-2010-audi-s5-key-3

vvdi-key-tool-plus-program-2010-audi-s5-key-4

vvdi-key-tool-plus-program-2010-audi-s5-key-5

vvdi-key-tool-plus-program-2010-audi-s5-key-6

Step 2: Make a Dealer Key

1. Go to: Make Dealer Key > Yes

2. Select:

"Have BCM2 data and all keys lost"

→ Choose A4L, A5, Q5 Add Key or All Keys Lost – No Working Key Required

3. Load the previously saved BCM2 data file.

4. Place a new key into the VVDI Key Tool Plus programmer.

5. Click OK to generate the dealer key.

6. Dealer key will be successfully created.

vvdi-key-tool-plus-program-2010-audi-s5-key-7

Step 3: Learn the Key

1. Select: Learn Key > Input Number of Keys to Learn: 1

2. Load the same BCM2 data file.

3. If you have a working key:

Insert it into the ignition and switch it on.

4. If all keys are lost:

Insert the dealer key into the ignition or near the coil.

Turn on the headlights and press the brake before continuing.

5. Insert each key one by one.

Once a key is successfully learned, the dashboard value X/Y will increase.

If using push start, press START/STOP after each successful key.

6. After all keys are learned, press OK to finish.

7. Test the new key – it should start the vehicle normally.

vvdi-key-tool-plus-program-2010-audi-s5-key-8

vvdi-key-tool-plus-program-2010-audi-s5-key-9

vvdi-key-tool-plus-program-2010-audi-s5-key-10

All keys programmed successfully!


For more tools and support, visit:

www.obd2shop.co.uk