Wednesday, 6 August 2025

Repair BMW XEQ384 FRM Module Using Xhorse VVDI PROG

When all FRM (Footwell Module) functions on a BMW stop working, the issue is often caused by corrupted FRM data. In this guide, we’ll walk through how to repair a BMW XEQ384 FRM module using the Xhorse VVDI PROG.

repair-bmw-xeq384-frm-module-using-vvdi-prog-1

Step 1: Remove the FRM Module


First, remove the FRM module from the vehicle. This allows us to read, edit, and write the data safely on the bench.


repair-bmw-xeq384-frm-module-using-vvdi-prog-2

repair-bmw-xeq384-frm-module-using-vvdi-prog-3

Step 2: Backup FRM Data

Connect the FRM Module

Follow the official wiring diagram to connect the FRM module to VVDI PROG.

VVDI PROG Settings

In the VVDI PROG software, select:

Type: 8 – OTHER

Brand: BMW

Chip: FRM-E-SERIES-XEQ384-READ

Once the connection is successful, proceed with data backup.


Read and Save Data

Read and save the D-FLASH file

Read and save the P-FLASH file


After backing up:

Clear faults

Edit the D-FLASH file

Prepare the corrected file for writing

Note: You may use a third-party paid service to correct the D-FLASH file if needed.

repair-bmw-xeq384-frm-module-using-vvdi-prog-4

repair-bmw-xeq384-frm-module-using-vvdi-prog-5

repair-bmw-xeq384-frm-module-using-vvdi-prog-6

repair-bmw-xeq384-frm-module-using-vvdi-prog-7

repair-bmw-xeq384-frm-module-using-vvdi-prog-8

Step 3: Write Data Back to the FRM

1. Select FRM-E-SERIES-XEQ384-WRITE in VVDI PROG

2. Load the corrected EEPROM file

3. Click Write

4. Wait for the Writing Success confirmation

Once completed, reinstall the FRM module into the BMW.

repair-bmw-xeq384-frm-module-using-vvdi-prog-9

repair-bmw-xeq384-frm-module-using-vvdi-prog-10

Final Check

After installation:

Recheck all FRM functions

Confirm lights, windows, and related systems are working normally


Repair complete.


www.obd2shop.co.uk

Wednesday, 23 July 2025

Changing XKGHG1EN Garage Remote Frequency with Key Tool MAX Pro

This guide provides step-by-step instructions on disassembling the XKGHG1EN Masker Garage Remote and modifying its frequency using the Xhorse VVDI Key Tool MAX Pro.


Step 1: Disassembling the XKGHG1EN Garage Remote

1. Remove the key cover:

Peel off the Xhorse logo sticker.

Use a screwdriver to remove the back screw.


2. Open the remote:

Take off the back cover.

Carefully remove the PCB board from the remote casing.


vvdi-key-tool-max-pro-change-garage-remote-frequency-1

vvdi-key-tool-max-pro-change-garage-remote-frequency-2

vvdi-key-tool-max-pro-change-garage-remote-frequency-3

Step 2: Changing the Garage Remote Frequency

1. Connect the remote to VVDI Key Tool MAX Pro:

Use a USB cable to link the garage remote to the device.


2. Access the frequency settings:

Go to Special Function > VVDI Remote Function > Garage Door Key Customization > Read.

The current frequency (e.g., 315MHz) will be displayed.


vvdi-key-tool-max-pro-change-garage-remote-frequency-4

vvdi-key-tool-max-pro-change-garage-remote-frequency-5

vvdi-key-tool-max-pro-change-garage-remote-frequency-6

3. Modify the frequency:

Click on the 315MHz value and enter the new frequency (e.g., 433MHz).

Click on the 055 (offset value in KHz) and adjust it within the allowed range.


vvdi-key-tool-max-pro-change-garage-remote-frequency-7

vvdi-key-tool-max-pro-change-garage-remote-frequency-8

vvdi-key-tool-max-pro-change-garage-remote-frequency-9

4. Save the settings:

Click "Settings" to confirm the changes.

A "Successful Setup" message will appear.


5. Verify the new frequency:

Re-read the remote frequency to confirm it has changed (e.g., now 433MHz).


vvdi-key-tool-max-pro-change-garage-remote-frequency-10

vvdi-key-tool-max-pro-change-garage-remote-frequency-11

Conclusion

With the Xhorse VVDI Key Tool MAX Pro, modifying the XKGHG1EN Garage Remote frequency is a quick and straightforward process. Follow the steps above to adjust the frequency as needed.


For more information, visit: www.obd2shop.co.uk

Monday, 21 July 2025

2018 Porsche Macan S AKL Using Xhorse VVDI Key Tool Plus

In this guide, we’ll walk through the process of performing an All Keys Lost (AKL) procedure on a 2018 Porsche Macan S using the Xhorse VVDI Key Tool Plus.


Step 1: Preparing the BCM & Extracting D-Flash


1. Disassemble the necessary components to access the Body Control Module (BCM).

2. Extract the D-Flash data to generate a new key.


xhorse-vvdi-key-tool-plus-program-2018-porsche-macan-s-akl-1

Step 2: Generating a New Key on the Bench


1. Connect the Porsche solder-free adapters to the BCM & VVDI Key Tool Plus.

2. Go to: Immo Programming → Porsche → New Porsche Key - Generate Dealer Key

3. Select a blank key position (e.g., Key 3).

4. Save the new EEPROM data after generating the key.

5. Refresh the newly saved file to the car.


xhorse-vvdi-key-tool-plus-program-2018-porsche-macan-s-akl-2

xhorse-vvdi-key-tool-plus-program-2018-porsche-macan-s-akl-3

xhorse-vvdi-key-tool-plus-program-2018-porsche-macan-s-akl-4


Note: If you need to add another key later, always use the newly saved EEPROM file for generation.


Step 3: Learning the Key via OBD

1. Reinstall the BCM back into the vehicle.

2. Go to: Immo Programming → Porsche → New Porsche Key - Key Learning

3. Follow the on-screen instructions to learn the new key and erase old keys (if desired).


xhorse-vvdi-key-tool-plus-program-2018-porsche-macan-s-akl-5

xhorse-vvdi-key-tool-plus-program-2018-porsche-macan-s-akl-6

xhorse-vvdi-key-tool-plus-program-2018-porsche-macan-s-akl-7


Final Testing

Test both newly programmed keys to ensure they start the vehicle and function properly.


Conclusion

Using the Xhorse VVDI Key Tool Plus, we successfully performed an AKL procedure on a 2018 Porsche Macan S by:

✅ Generating a new key on the bench

✅ Learning the key via OBD

✅ Ensuring all keys work correctly


For more tools and support, visit: www.obd2shop.co.uk


Wednesday, 16 July 2025

Solved: MINI Key Tool Error – "Combine SN with Xhorse App!"

Problem: When using the Xhorse VVDI MINI Key Tool to clone ID48 (96-bit), the device shows the following error message:

"Sending data file (Envio de archivo de datos): Please combine SN with Xhorse App!"

However, the SN (serial number) was already combined with the Xhorse App.


solved-mini-key-tool-combine-sn-with-xhorse-app-error-1

solved-mini-key-tool-combine-sn-with-xhorse-app-error-2

Solution:

Make sure you are logged into the same Xhorse account on the MINI Key Tool that was used to bind the serial number.

Important: Do NOT log in with a different or new account, or the error will persist.

Once you log in with the correct account, the issue will be resolved.


Technical Support:

www.obd2shop.co.uk

Thursday, 10 July 2025

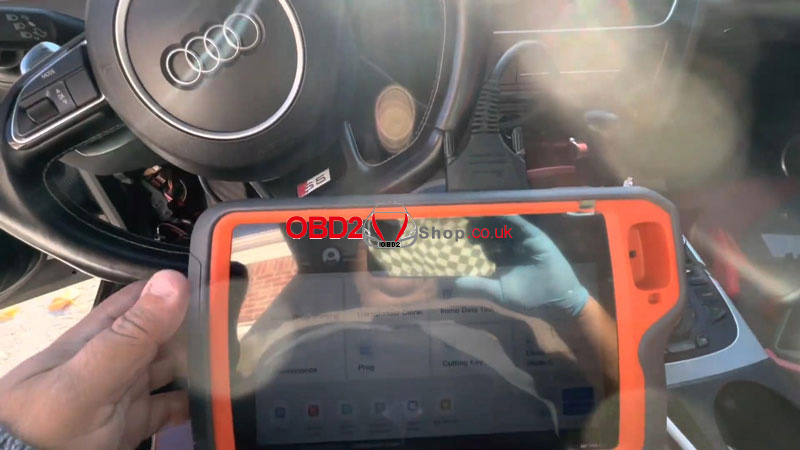
How to use Key Tool Plus to Program 2010 Audi S5 via OBD

In this tutorial, we’ll guide you step-by-step on how to program a 2010 Audi S5 (all keys lost) using Xhorse VVDI Key Tool Plus via OBD. The full procedure includes reading and saving BCM2 data, making a dealer key, and learning the key to the vehicle.

vvdi-key-tool-plus-program-2010-audi-s5-key-1

Step 1: Read & Save BCM2 Data

1. Go to: Immo Programming > BMW > Audi > Automatically Diagnose Models > Start Programming

2. Once the 5th generation immo system is detected, click OK.

3. Choose Read BCM2 Data > OBD Identify BCM2 Type.

4. Follow on-screen prompts:

If you have a key: insert it into the ignition.

If all keys are lost: turn on hazard lights, press and release the brake pedal several times.

5. When prompted:

Read by OBDII > Read BCM2 Data (OBDII) > OK

6. Disconnect BCM module power for 2–3 seconds, then reconnect and click OK to reattempt.

7. Save the BCM2 data file once reading is complete.

vvdi-key-tool-plus-program-2010-audi-s5-key-2

vvdi-key-tool-plus-program-2010-audi-s5-key-3

vvdi-key-tool-plus-program-2010-audi-s5-key-4

vvdi-key-tool-plus-program-2010-audi-s5-key-5

vvdi-key-tool-plus-program-2010-audi-s5-key-6

Step 2: Make a Dealer Key

1. Go to: Make Dealer Key > Yes

2. Select:

"Have BCM2 data and all keys lost"

→ Choose A4L, A5, Q5 Add Key or All Keys Lost – No Working Key Required

3. Load the previously saved BCM2 data file.

4. Place a new key into the VVDI Key Tool Plus programmer.

5. Click OK to generate the dealer key.

6. Dealer key will be successfully created.

vvdi-key-tool-plus-program-2010-audi-s5-key-7

Step 3: Learn the Key

1. Select: Learn Key > Input Number of Keys to Learn: 1

2. Load the same BCM2 data file.

3. If you have a working key:

Insert it into the ignition and switch it on.

4. If all keys are lost:

Insert the dealer key into the ignition or near the coil.

Turn on the headlights and press the brake before continuing.

5. Insert each key one by one.

Once a key is successfully learned, the dashboard value X/Y will increase.

If using push start, press START/STOP after each successful key.

6. After all keys are learned, press OK to finish.

7. Test the new key – it should start the vehicle normally.

vvdi-key-tool-plus-program-2010-audi-s5-key-8

vvdi-key-tool-plus-program-2010-audi-s5-key-9

vvdi-key-tool-plus-program-2010-audi-s5-key-10

All keys programmed successfully!


For more tools and support, visit:

www.obd2shop.co.uk

Modifying HON66 to VA2T Key Blank via Xhorse Condor XC-MINI Plus II

The Xhorse Condor XC-MINI Plus II and Dolphin II Key Cutting Machine feature the "Modify Key" function. This guide demonstrates how to convert an HON66 key blank into a VA2T key blank using this capability.

xhorse-condor-xc-mini-plus-ii-modify-hon66-to-va2t-1

Step 1: Modify HON66 to VA2T

Since the HON66 blank is wider than the VA2T, we need to remove the excess material.

1. Select "Modify Key" → Choose VA2T as the target blank.

2. Follow the on-screen instructions to install the HON66 blank.

3. Start cutting with default settings → The machine will begin automatically.

4. Wait until the process completes—the edge of the HON66 will now be partially trimmed.

5. Reinstall the key blank in reverse to cut the remaining excess.

6. You now have a custom VA2T key blank!

xhorse-condor-xc-mini-plus-ii-modify-hon66-to-va2t-2

xhorse-condor-xc-mini-plus-ii-modify-hon66-to-va2t-3

xhorse-condor-xc-mini-plus-ii-modify-hon66-to-va2t-4

xhorse-condor-xc-mini-plus-ii-modify-hon66-to-va2t-5

xhorse-condor-xc-mini-plus-ii-modify-hon66-to-va2t-6

xhorse-condor-xc-mini-plus-ii-modify-hon66-to-va2t-7

Step 2: Copy a VA2T Key

Now, we can use the modified blank to duplicate a VA2T key.

1. Navigate: Automotive → Key Blank → VA2T.

2. Rotate the M5 clamp to Side B and insert the original key.

3. Select "Decode Key" to learn the cuts.

4. Once decoded, remove the original key and insert the new blank.

5. Start cutting → Repeat for the other side.

6. Cutting completed!

The new key works perfectly and opens the lock smoothly.

xhorse-condor-xc-mini-plus-ii-modify-hon66-to-va2t-8

xhorse-condor-xc-mini-plus-ii-modify-hon66-to-va2t-9

xhorse-condor-xc-mini-plus-ii-modify-hon66-to-va2t-10
Watch the Full Video Tutorial

For a complete demonstration, check out the video:


www.obd2shop.co.uk

Thursday, 26 June 2025

How to Change Super Chip Type with VVDI MINI Key Tool

The Xhorse VVDI MINI Key Tool allows for easy modification of the super chip type for XT27A01 / XT27A66 super chips without erasing data. This allows users to directly set the transponder type, making the process fast and efficient.


Supported Feature Highlights:

No chip erasing required

Direct transponder type setting

Simple operation via VVDI MINI Key Tool


How to Set VVDI Super Chip Type

Step-by-Step Instructions

1. Place the VVDI super chip into the coil area of the VVDI MINI Key Tool.

2. On the device, follow the menu path:

Mini Key Tool → VVDI Super Chip → Set as ID4C

3. Enter the required details and tap OK.

4. Once completed, the setup will be successful.

how-to-change-super-chip-type-with-vvdi-mini-key-tool-1

how-to-change-super-chip-type-with-vvdi-mini-key-tool-2

how-to-change-super-chip-type-with-vvdi-mini-key-tool-3

how-to-change-super-chip-type-with-vvdi-mini-key-tool-4

How to Change to Another Transponder Type

1. Select “Set as ID4E (ID64)” from the menu.

2. Confirm the operation.

3. The transponder type will be changed successfully.


how-to-change-super-chip-type-with-vvdi-mini-key-tool-5

Supported Transponder Types

The VVDI MINI Key Tool supports the following transponder types:

ID11

ID12

ID13

IDPCF7935

IDPCF7936

IDPCF7937

IDPCF7938

IDPCF7939

IDPCF7946

ID48

ID4C

ID4D

ID4D (80)

ID4E

ID8A

ID8C

ID8E


how-to-change-super-chip-type-with-vvdi-mini-key-tool-6

With this function, the Xhorse VVDI MINI Key Tool enables locksmiths and technicians to quickly and reliably configure VVDI super chips for various vehicle requirements.


For more professional automotive diagnostic and key programming tools, visit: www.obd2shop.co.uk.